
I thought today I'd give my version of a tutorial as to how this was done. Please remember too that everyone does this different ways. My may or may not work for you.
First, here are the pictures of the ceilings that are done....
The main bathroom....I used 4 inch 5/8 thick pine tongue and groove bead board. I left the natural finish and just put a clear coat of polyurethane on it.

My son Reece's room

My daughter Sami's room

My master bedroom


Bathroom/laundry room

Thankfully, the living room, kitchen, hallway, my son RJ's room, and stairwell already have gorgeous cedar ceilings. When I get to the renovations of these rooms, the ceilings will be staying as is...

The master bath is in the process of renovations right now, so even though the boards are already up, the construction around them is still happening so it will be a little easier for me to give the tutorial.
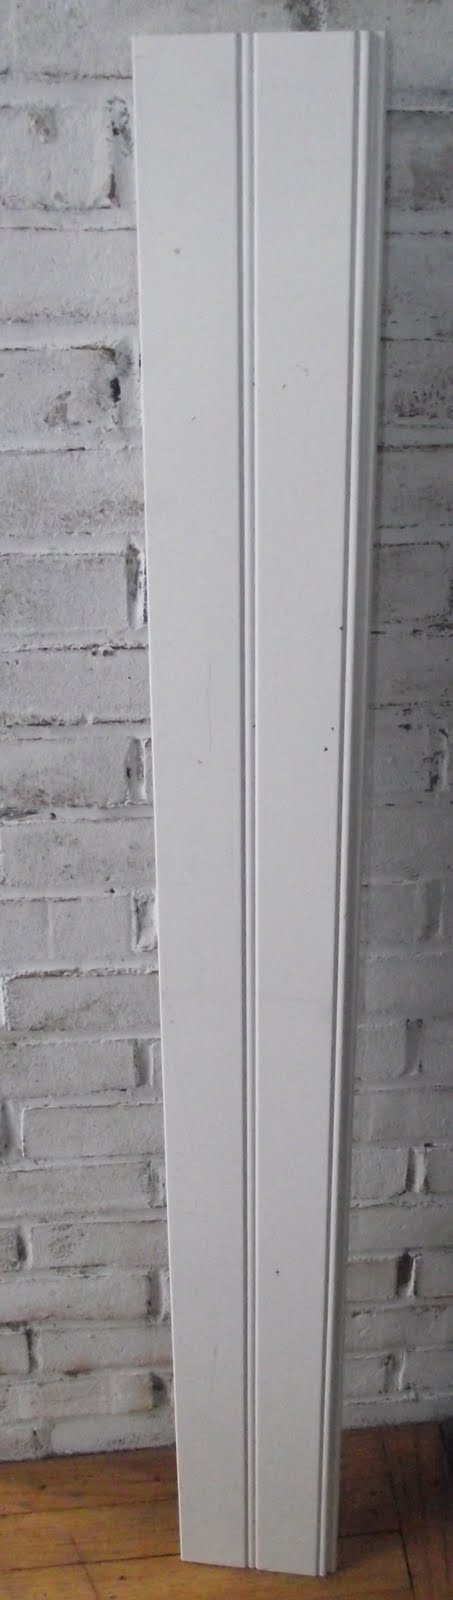
Other than the main bath, I use 6 inch 3/4" thick bead board. I buy it pre primed since I am painting it anyway. It is less expensive because it is PFJ (prime finger jointed) and has a few flaws here and there. But, this is fixed this with caulk, filler, and paint....All of which I'd be using anyway. It is real wood. Just not as gorgeous and well made as the pine we used in the main bath.
This is what it looks like with the tongue and grooves:


You obviously buy boards longer than the length of the room. Each board is cut to size as you go along. Do not assume you can cut all boards ahead of time to the length. Even if you are working in a square or rectangular room, the lengths can be off slightly due to the original framing. We worked with a gutted ceiling so our studs to nail the outer boards to were exposed. If you are working on a sheet rocked or popcorn ceiling, be sure to mark off the studs prior to starting.
Cut your first board to size. A nail gun was used and placed the first board. We nailed the length and ends to the studs. These nail holes and uneven edges will be covered later with crown molding.

Cut your next board to size. Fit the tongue into the groove. It helps to cut a small piece to use as a tapping block. Put this on the outside of the board and bang the board into the stationed board. This prevents damaging the board you are using. At this point you don't not want any nail holes on the surface of the ceiling. Nail the edges that will be covered with crown and nail the groove into the sheet rock. It is ok if the nails in the groove don't go directly into studs. These are just stabilizers. The nails at the ends and the next piece you put in will hold it into place. Continue on until you hit an obstacle such as a fan, light fixture, or a wall that may jet in or out.


Notice in the second picture above there happens to be a boxed in area for the heating system. When we got to the end of this area our ceiling became wider. If you get to a point such as this, you may need to notch part of the board out to fit the puzzle of the ceiling. We use a jigsaw for this. When you get to something such as the light or ceiling fan gap I have shown, just cut two separate boards to butt up to each side of the hole. You might have to do a little notching here too. Don't worry, the cuts and notches will be covered by the fixture you are putting up.
When you come to the last board, be prepared to be stressed!! This is unfortunately a difficult board to put up. You have to angle it in. A chisel is used to place between the last board and the stud.

Be sure to nail the last board along the edges and the length to the stud. The next step is filling any knicks or dings in the ceiling. Sand when dry. Do not paint until you are done putting up your crown, filling holes in the crown, and caulking the top and bottom of the crown.
Again, here is the before....

And after....

I highly recommend you spend the little bit extra and purchase your wood from a reputable lumber yard. Although I purchase a lot from Home Depot or Lowe's I steer clear from getting our wood there. You may think you are saving, but the wood you get from Home Depot will be damaged, not as durable, and the quality just isn't the same. You will end up throwing boards away and spending more in the long run. Surprisingly, my crown molding was even less expensive at my lumber yard than Home Depot and they delivered for free because we had a large order.
Please remember this tutorial is coming from a stay at home mom. LOL
Have a great Sunday...
Lisa


I am excited to see this! We are going to undertake this project soon... I am desperate to cover my popcorn ceilings!
ReplyDeleteBeautiful ceilings everywhere!
ReplyDeleteLisa, your ceilings look fantastic! That's a great tip to check out lumber yards. We bought our crown from Lowe's, and much of it was warped. Next time we might try a lumber yard to see if they have better options. So glad I came across your blog. I'm a new follower!
ReplyDeleteWow, your whole house?? Amazing! I love this look, good job with the tutorial!
ReplyDeleteLove how you're carrying the overall look through the house. The ceilings are much overlooked in our house. Great job! They look fantastic, Lisa! xo
ReplyDeleteLooks fantastic! You have a very lovely blog. Visiting from A Little Knick Knack...
ReplyDeleteT.Bird
I love this, you did a great job. Thanks for sharing all of your great photos.
ReplyDeleteLisa, these are so beautiful...makes one want to look up..all the time!!!
ReplyDeleteWe have popcorn ceilings in our home. I never look up.
You have made such a transformation by doing your ceilings this way. As I was reading along I was thinking how New England it reminds me and then I saw that you lived in CT!
Thanks for the information about them and about the wood. That was very helpful to know!
Have a great rest of the weekend,
~Kolein
Love your ceilings -- they are all beautiful. Love your blog, too. I'm having trouble with my follow button so I put you on my sidebar so I won't miss anything.
ReplyDeleteit makes such a huge difference. i especially love the feel of it in a bathroom, and family area.
ReplyDeleteThis ceiling looks so sharp! I would be honored to have you add it to my blog party
ReplyDeleteAmaze Me Monday Blog Party
Thank you so much for the tutorial. It was very informative and concise in your directions and descriptions. Now, I have one more question for you and your husband ... when can you come to Canada to install these in my home????? Our relationship barely survived wallpapering our tiny entranceway. It will be off to divorce court if we attempt these ceilings!
ReplyDeleteWhat beautiful ceilings! I've thought about doing something fancy with our ceilings a few times but always chicken out. Now that I have a tutorial, look out boring ceilings! :)
ReplyDeleteHey great post - thanks!
ReplyDeleteThis would be a great idea for my bedroom!!
I'm jealous! What lovely ceilings! They look so expensive! I am featuring this post at somedaycrafts.blogspot.com. Grab my "featured" button.
ReplyDeleteshoot... I came thinking I wanted beadboard ceilings, but (although I may still put them up in some rooms) I think now I want your cedar ceilings... at least in my bedroom :)
ReplyDeleteOh, thank you for this tutorial. You make it seem manageable. Our bathroom is first!
ReplyDeleteYou have inspired me. Thank you. We want to do this on our front porch. Such a great looks. Job well done.
ReplyDeleteThat is a great tutorial. It came out beautifully.
ReplyDeleteOMGosh...your ceilings are to..die..for.
ReplyDeleteI would LOVE to have this in my large living room. I am pretty sure Mr. Sweet's eyes would roll to the back of his head if I ever mention it. But....I can dream. :)))
Wow! Those are some beautiful ceilings. I love the moldings to. They add so much character! Very nice! Thanks for showing us how! I am loving your blog and I am your newest follower. I hope you'll come by and say hi! :)
ReplyDelete~Liz
Thank you so much! This is on my list this year. One quick question. When you come to a vent, do you just screw the vent cover back in or do you have to somehow extend it?
ReplyDeleteThe ceilings are INCREDIBLE!!! SO beautiful - well worth the work, I'm sure! Happy White Wednesday - Tanya
ReplyDeleteI love the bead board ceilings and that is a lot of hard work working over head. We did the tongue and groove bead board in the sun room. Thanks for joining the party each week, but please add a link to my blog in your post.
ReplyDeleteHi Kim....I have a page dedicated to all of the parties I link too and you are included on this.
ReplyDeleteTake care,
Lisa
Ceilings look awesome!!
ReplyDelete*´¨)
¸.*´¸.**´¨) ¸.**´¨)
(¸.*´ (¸.*´* Lori Lynn *
PS: I'm having a 400th post giveaway!!
This is awesome Lisa & that would totally be me my husband cussing at each other on ladders!! jenT
ReplyDeleteLisa ~ thank you so much for the great tutorial! We have beadboard on some of our farmhouse walls, but I'd love to cover up the textured ceilings with this. Your rooms look so warm and cozy! Great job! Happy WW to you!
ReplyDeletexoxo laurie
Lisa - Love the beadboard ceilings ...all of them! The natural is my favorite. Thanks for sharing this great tutorial and linking up to The Sunday showcase party - I have featured this today. Stop by and grab a featured button if you like. Hope you have a wonderful week ~ Stephanie Lynn
ReplyDeleteYour ceilings look wonderful! It adds so much character and detail to the rooms. Plus it pulls in the other part of the house to make it consistent. I think you both are doing a fantastic job!!
ReplyDeleteOh wow!! Your ceilings are gorgeous!! We plan on planking the ceiling in the living room, dining room and kitchen this spring. I am so excited! I hope my ceilings turn out as good as yours. :)
ReplyDeleteBeth.
WOW! This is fabulous, I could only dream of this in one of our rooms!!!
ReplyDeleteThanks for linking!
XO
Kristin
Wow, I love your ceilings! They are all gorgeously done!
ReplyDeleteI pinned this :)
ReplyDeleteI would love to do this on my front porch! It isn't enclosed. Do you think that this would work? I am so ready to tear down the painted plywood that was put up by some "flipper".
ReplyDeleteI really like the ceiling for your bathroom. There's just something about it that makes you feel comfortable and safe.
ReplyDelete-Zane of ontario honey
Great tutorial. We are using v-groove instead of beaded groove. We've got the board up, and the crown molding, and now I'm searching for the answer to another question. Did you caulk all four sides where the crown was against the ceiling?
ReplyDeleteIf so, what did you do about the openings where the bead is? Ours may have a bigger "hole" there than the beaded kind. It looks like you didn't on the natural wood bathroom ceiling but it kind of looks like you did on one of the white ceilings.
I'm not sure what to do here. Thanks for the help.
Hi Lisa, I haven't been on your blog forever, but found this tutorial. Can I ask you why you chose the slats instead of the whole sheet? I'm wondering if your way is easier or cheaper. I want to do this to my whole house but not sure where to start.
ReplyDeleteYou did an excellent job, it looks wonderful!
ReplyDeleteCedar ceilings look awesome, reminds me of some incense cedar I have seen.
ReplyDeleteI visited your blog for the first time and just been your fan and get many informative information about the wood ceilings. I Will be back often to check up on new stuff you post well done.
ReplyDeletewood ceilings
Super blog and your presenting style about the box auto in legno that's are very appreciated good work.
ReplyDeletebox auto in legno