Today was a day to CLEAN and organize my house. Tomorrow the tree will come down. Needless to say, I didn't get the chance to tackle many projects today. I was able to check a chair refinish of "the list" though....
The "before" shot is very boring, plain, and drab.....
A coat of primer, two coats of paint, and some distressing.....
Randy picked up a decent dresser for me today at Goodwill...Hopefully I will have the reveal to post tomorrow.....
Take care,
Lisa
Linking here:
Common Ground
Chic on a Shoestring Decorating
French Country Cottage
Finding Fabulous
Fingerprints on the Fridge
Miss Mustard Seed
My Romantic Home
Friday, December 31, 2010
Thursday, December 30, 2010
Shabby winter mantle....
Yesterday I gave a sneak peak of my winter mantle. I threw together a shabby wreath that I had shown HERE
I completed the surround today. I kept it pretty simple. Here is the inspiration (I added a mercury glass acorn to the wreath that I hadn't shown in the post yesterday)
A burlap runner spreads across the top. An apothecary jar holds all of my vintage glass door knobs. Two little birds sit side by side.
I left the "Our Nest" sign up that I had hanging with my Christmas mantle scape. I made this out of a large piece of vintage cedar. Wood scrolls encase each corner. Photos of a bird and a nest I printed from the GRAPHICS FAIRY embellish each side.
I mentioned recently that I would give a tutorial as to how I painted my brick wall.
Believe it or not, it was pretty simple painting this monster wall...
Here is the before:
I simply rolled on one coat of flat paint. I didn't worry about covering every nook and crannie because I planned on distressing it anyway....
After I was done with the painting, I used a 50 grit sandpaper and my palm sander. It took about an hour to do the entire wall....This is the end result.
Take care,
Lisa
Linking here:
Paisley Passions
Labels:
Before and after,
Cottage,
french country,
painted,
shabby chic
Wednesday, December 29, 2010
Out with the old, and in with the new....
I don't know about anyone else, but I am officially sick of Christmas decor. I was impressed that my pine wreath over the mantle made it this long, but as of yesterday the needles are starting to fall. Therefore, it is time to be rid of the Christmas mantle scape. I am going to complete my new decor tomorrow, but thought I'd at least give a sneak peak of the new wreath I have concocted for my winter scene.....And winter is here in Connecticut as far as the blizzard that started here on Sunday....
Typically I'd make this wreath myself, but this one was 60% off at one of my favorite stores that is unfortunately going out of business. So, to make life easier on myself, I purchased this at a discounted price of $14.
Years ago I purchased a metal strand at the same store for 70% off after Christmas. I have been hanging onto it all this time waiting for the right project. I honestly think I have had them for 6 years. I cut the wire in between each object and dry brushed white paint onto each one.....
Then I pieced it all together along with some greenery to come up with this:
If you get the chance, stop by tomorrow to see the completed project....
Take care,
Lisa
Linking here:
Restore Interiors
Labels:
Before and after,
Cottage,
french country,
Holiday,
shabby chic
Tuesday, December 28, 2010
Shabby chic table centerpiece.....
Have you ever gone to bed at night and not been able to fall asleep because you have decorating on the mind? Please tell me I am not the only wacko out there who does that! Last night I go down to bed and out of no where a project pops into my head....
Unfortunately, both of my Grandparent's passed away with in the past 2 1/2 years. It was about exactly a year ago that I went with my mother to their house to clean out the estate. So sad, but also so memorable. Of course I kept quite a few items and knew I'd eventually utilize every last one. My Grandmother had these 9 gorgeous mismatched china tea cups and saucers. Now to be honest, I am not the type to display something like this permanently in a hutch, so they have sat in storage until I could come up with the perfect plan...Well, that "perfect plan" popped into my head last night when I should have been sleeping.
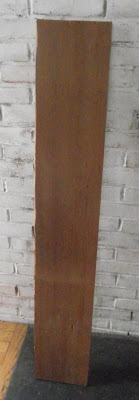
This morning I cut a vintage cedar board to the size I needed...
I painted it a slate gray, distressed it, and added 4 wooden knobs to the bottom of each corner with gorilla glue....I also painted and distressed the knobs the same color as the board.
I got my good ol' very strong Loctite epoxy glue....
I glued each saucer along the length of the board staggering each one. I added some tea lights. Not only do I have a unique tablescape, but I have a VERY memorable one....
Honestly, the pictures do not begin to give this justice. My camera wouldn't pick up on the effect with the candles lit and the lights out. The feeling I had when I lit these was overwhelming. It was so serene.
This summer, I will add some water and beautiful flowers from the garden....
Thanks for stopping by....
Take care,
Lisa
Linking here:
Bella Before and After
Restore Interiors
Labels:
Before and after,
Cottage,
french country,
Memories,
Paris apartment,
shabby chic
Monday, December 27, 2010
Eclectic chic bathroom makeover
A few years back we gutted and renovated our very dated bathroom from the 60's. Although it was new, I was never pleased with how I decorated it. I think I painted it 5 different times. Finally, I decided to go with a sea foam color and do pinstripes. I also purchased a shower curtain from Urban Outfitters that I LOVED.
Many of you saw this makeover on my previous blog that went "poof" :( , but I wanted to have it documented again. In addition, I have added more decor since then.
On the wall I have just shown, you can see the newest wall art I created yesterday and posted about HERE
This is the magazine rack I made from the side rail of a vintage crib. It hangs from chains....
An antique sap bucket I painted is the trash can....
Then there is my shower curtain from Urban Outfitters that I splurged on seeing that I get 99% of all my other decor at thrift stores....
The sink I have is a console sink. Although I love the look of it, I do not recommend one. I have learned the hard way that they are very impractical.
The bucket art was purchased from IKEA. It was black, so I sprayed it white to go with my decor.
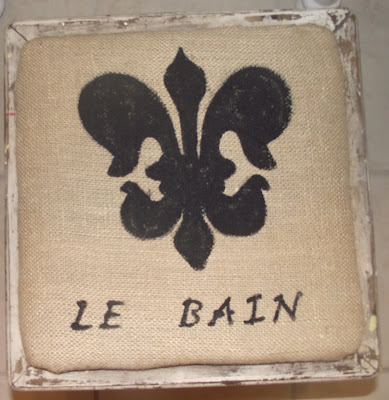
I reupholstered the stool top with burlap and painted a fleur de lis on it....
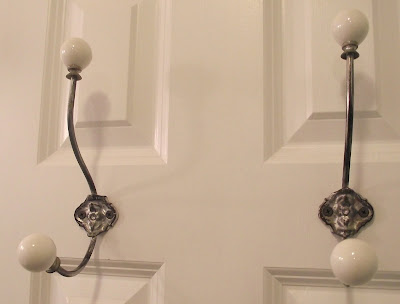
I have a bit of an OCD with bath towels showing....So, I hung a couple of hooks on the back of the door...
We did a bead board ceiling. Unlike all of the others that we are painting white, we opted to leave the natural wood on this one...
Take care,
Lisa
Linking here:Lisa
Making The World Cuter
Between Naps on the Porch
It's so Very Cheri
Bella Before and After
Paisley Passions
The Lettered Cottage
Labels:
Cottage,
house renovations,
painted,
Paris apartment,
shabby chic
Subscribe to:
Comments (Atom)


